
Shiny new toys
I've been splashing out

Avid readers of Dapple Scrumping (yes that is you, pay attention at the back) will know that I have been having recurring ink problems in recent prints, especially when printing with any mixes including white. I have huge loyalty and affection for my usual ink suppliers, who are local to me and personal friends (the York art scene is small and tightly interconnected), but after yet another frustrating printing session I decided the time has come to try another approach. So with a not insignificant amount of guilt I have bought a basic supply of Cranfield Traditional Relief Inks. In my defence, and to assuage my discomfort a little, I must point out I do owe a debt of gratitude to Cranfield for sponsoring a prize awarded to me at last year’s Ironbridge Fine Arts printmaking competition, so this, plus the fact that several printmakers I admire use Cranfield inks, has led me to investigate the range further. (I should stress at this point that I am not abandoning my usual inks which have served me very well indeed for more than a decade, but I want to see if there might be options more suited to very specific prints and techniques).

When I first started out in printmaking I used Caligo Safe Wash relief inks, which have since joined the Cranfield family, and it was a set of these that was my prize last year. These were also the inks I used when teaching workshops. They have many advantages; first of all they are easy to clean up with soap and water (the clue is in the name) and they are available in the three process colours (cyan, magenta and yellow) meaning you can mix pretty much any colour you want with just a few tubes. Both of these things make them an excellent choice for beginners and workshops, but I also know many professional printmakers continue to use them beyond this with great results. However the main drawback for me was that I found that they dried quite quickly on the slab which made them less suitable for the sort of long, protracted, fiddly printing sessions I get tied up in, and wandering off to have lunch half way through was definitely out of the question. I have decided then to give Cranfield’s ‘Traditional’ range a whirl in the hope these will strike the happy medium (pardon the pun) between drying too quickly while working and drying too slowly when printing multiple layers.
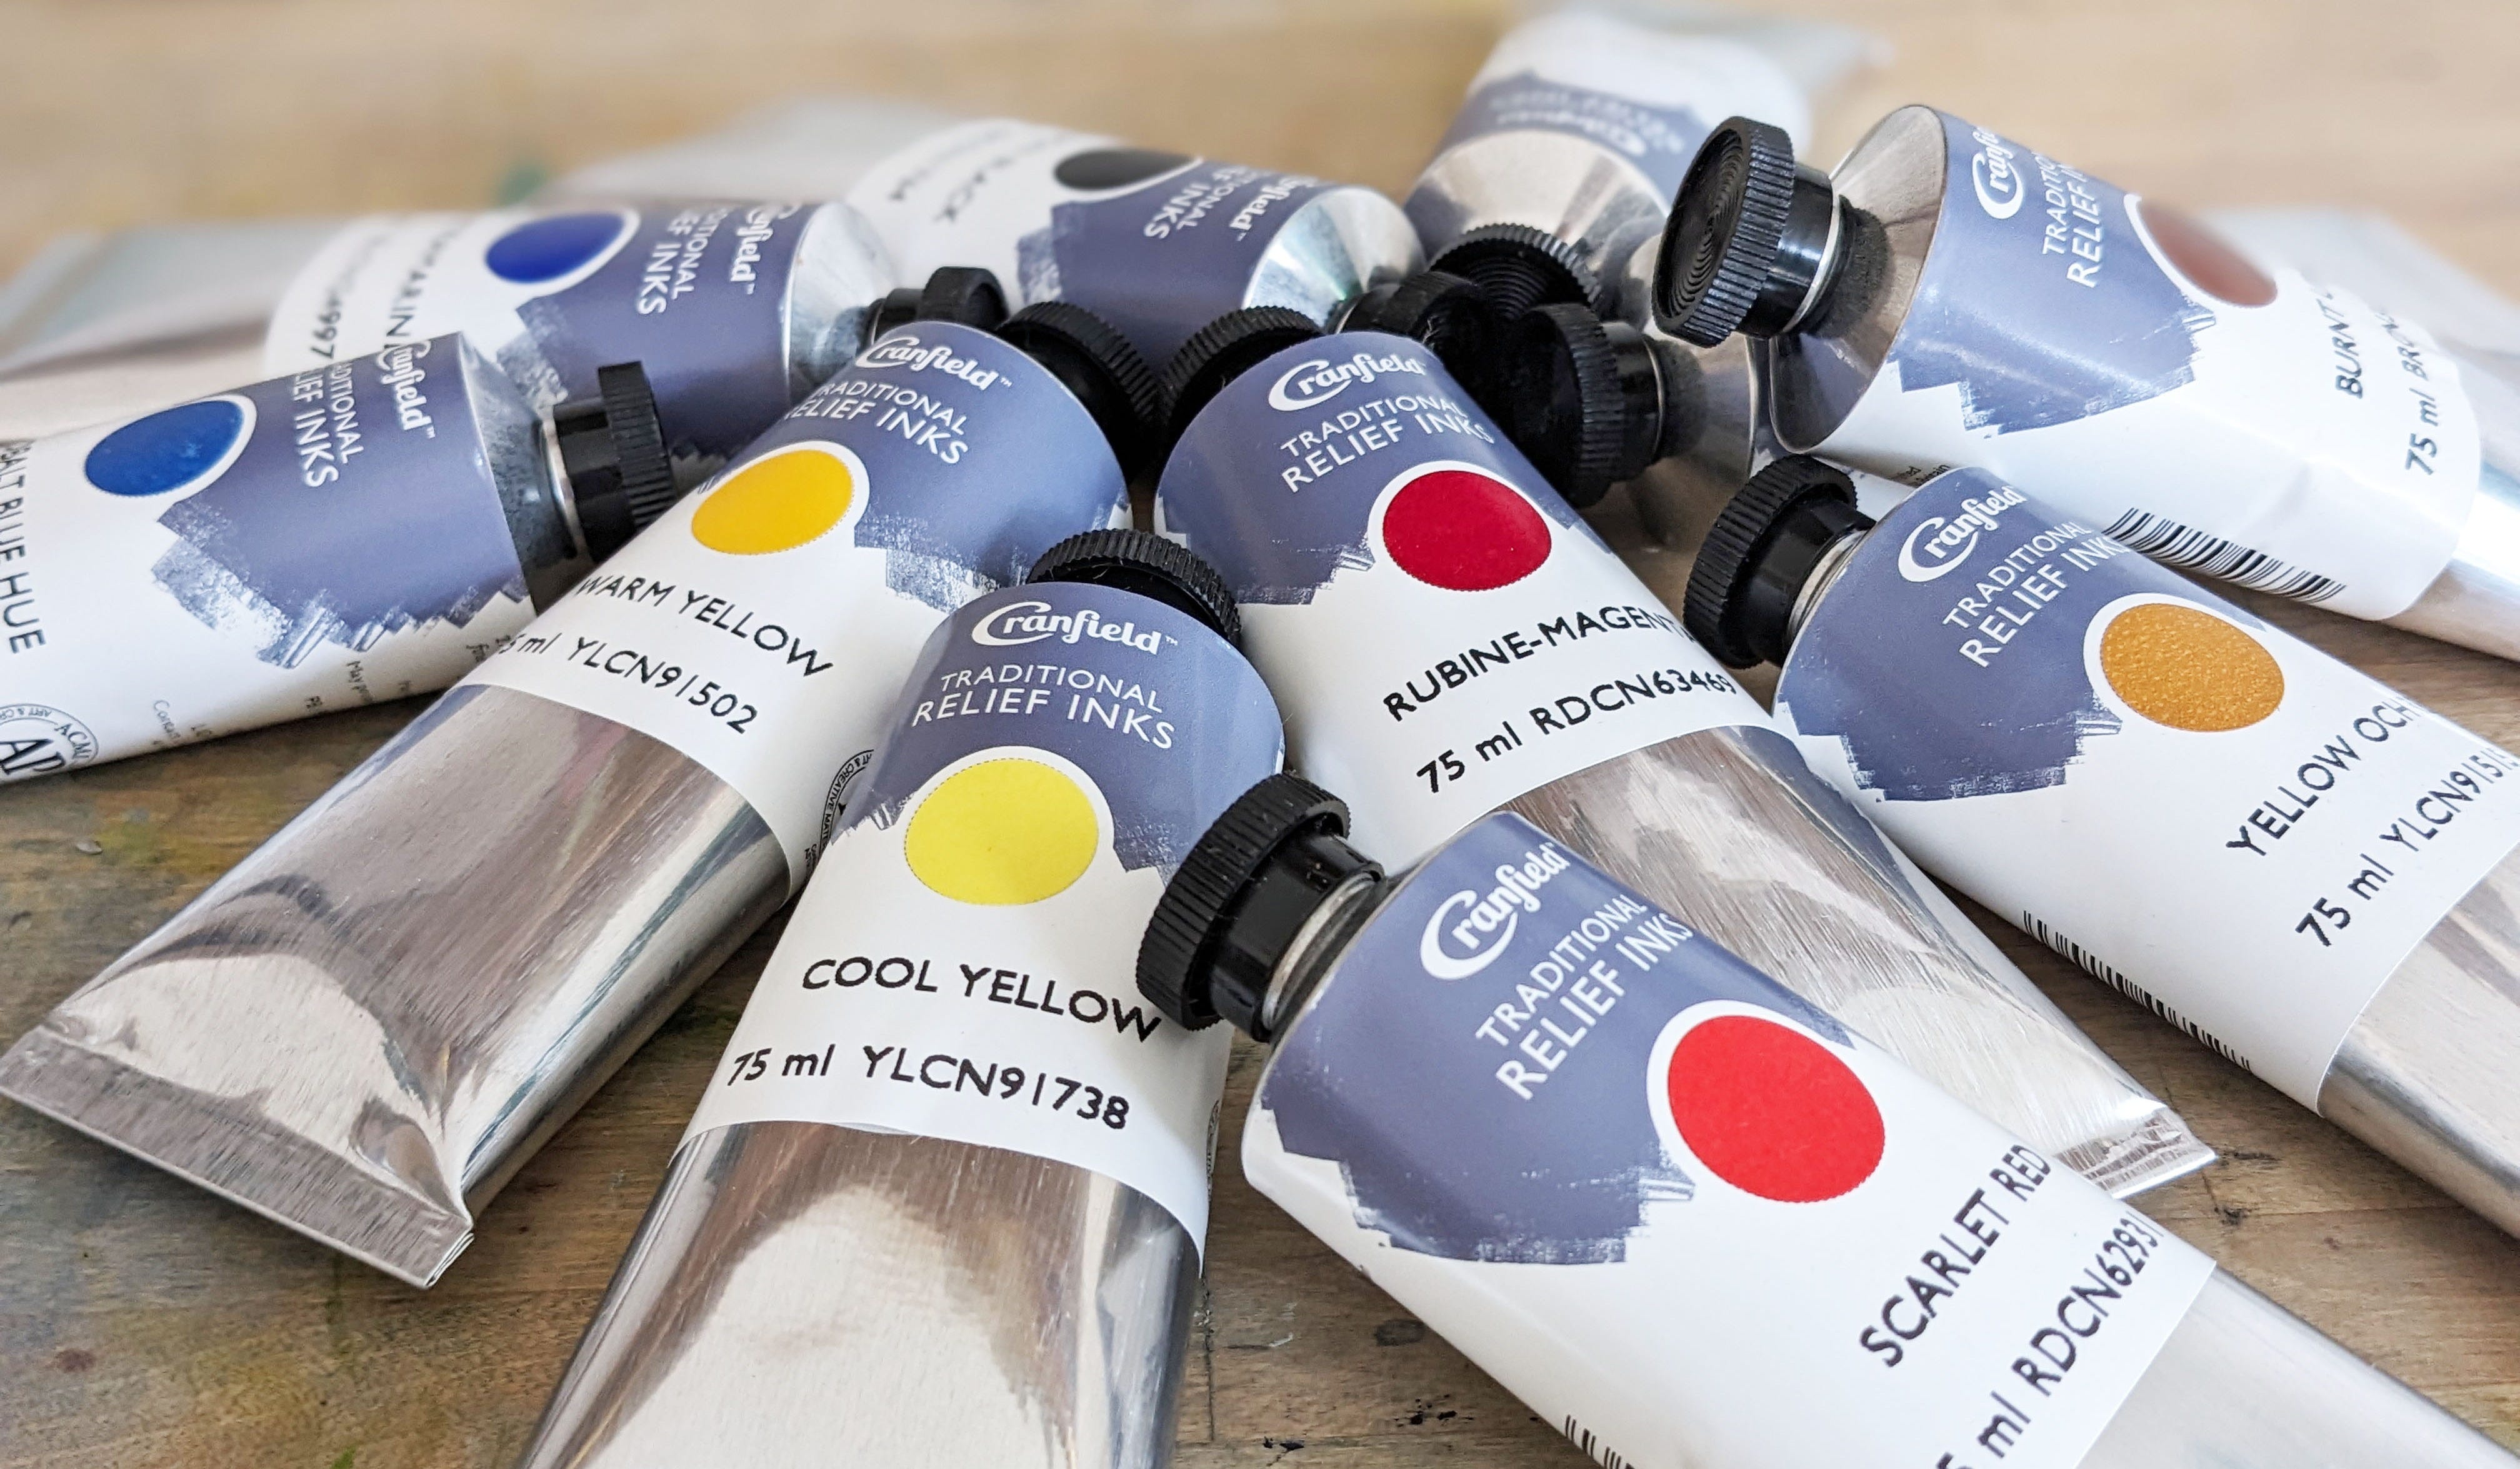
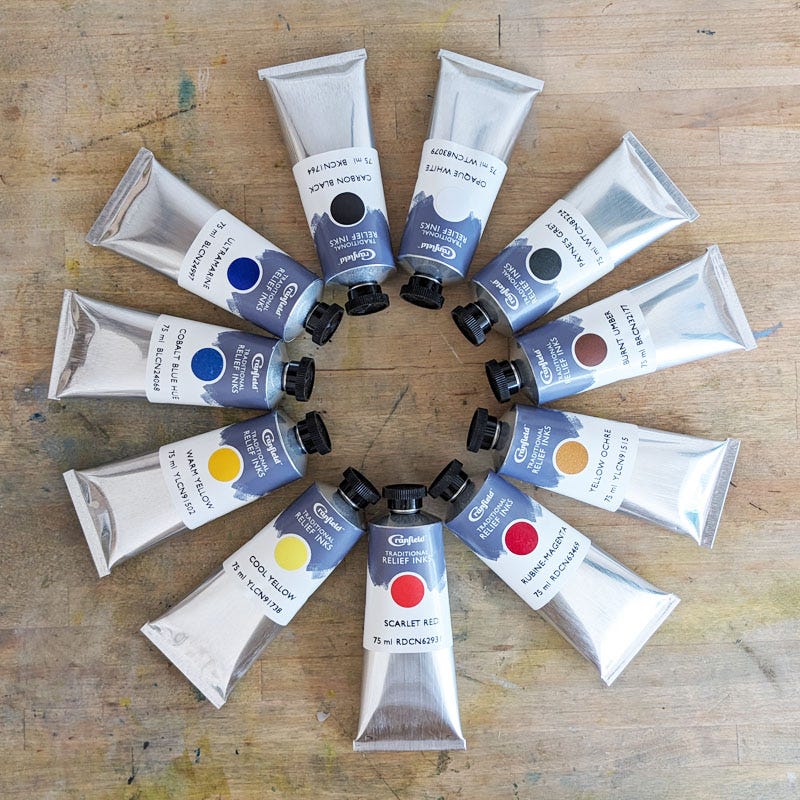
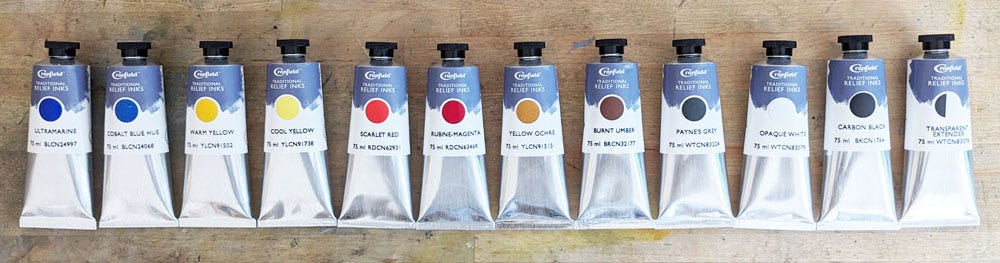
Unusually this range does not offer the process colours so instead I’ve recreated the palette I used to use in my watercolour days. I’ve selected warm and cool versions in each of blue, red and yellow, plus a couple of earth colours. I have also added black, white and Payne’s Grey to my selection, none of which I used in watercolour but printmaking is a different beast. I don’t use black on its own but a small dot can modify a colour quite dramatically (for instance turning yellow into green, or blue into teal). White also has a part to play in printmaking whereas in watercolour white would simply be unpainted paper, and I often use a thinned down Payne’s Grey to print over previous colours to darken areas, especially on foliage. So far then I am up to eleven tubes of colour (list below1). In addition I have bought some extender, to add transparency to my colours for my usual layering technique, and Cranfield’s own wax driers as an alternative to the cobalt driers I have used previously. I will see how I get on and then I can add more colours as I go, if I feel they will be useful.
This has all been quite an investment but what the heck, you can’t take it with you. I have opted for the 75ml tubes rather than the large 500g tins; on paper this might appear to be the expensive option but I know from experience that buying tins can be a false economy as the ink will start drying and skinning over from the first time the tin is opened, while the tubes should stay fresh and usable to the end. For UK readers who might want to know, I bought my supplies from Jackson’s Art, who had a handily timed printmaking sale on at the time2, and I turned to another favourite supplier, Handprinted, for those items which were out of stock at Jackson’s due to the success of the aforementioned sale.
More new things
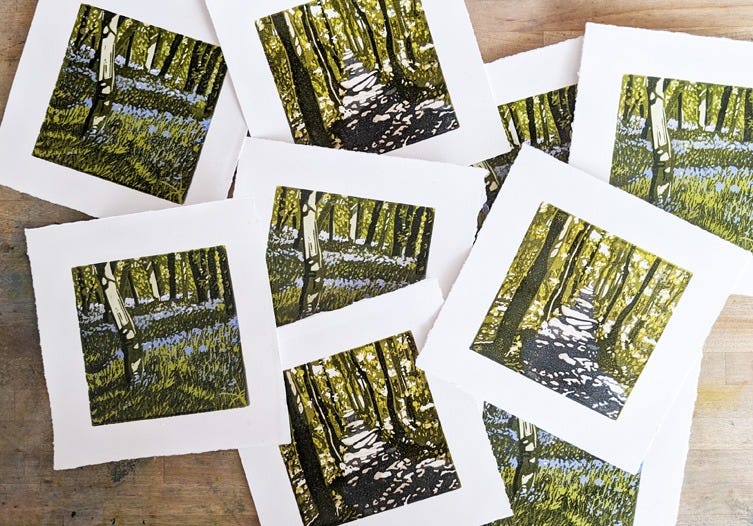
These mini-prints which I mentioned in my last newsletter will be available for the first time at Printfest: 2nd - 4th May, The Coro, Ulverston. The printed area measures just 10 x 10cm and the paper is about 15 x 15cm. (And for these, my usual inks behaved impeccably).
Advance tickets for Printfest can be bought online if you’re organised, or if you want to keep your options open they can be bought on the door on Saturday and Sunday. Only the Friday evening preview needs to be booked in advance. Full information is here.
I’ve now had confirmation of which stand I’ve been allocated so I can start doing some serious planning of my hanging. I’ve also seen a proof of the catalogue which goes to print next week. It’s all getting very exciting! Oh and I’ve also just ordered 320 greetings cards, restocking popular designs plus two new ones. They’ll be in my website shop soon, and of course at Printfest.
Thanks as always for reading and see you again soon I hope
Jane
Ultramarine, Cobalt Blue Hue, Warm Yellow, Cool Yellow, Scarlet Red, Rubine-Magenta, Yellow Ochre, Burnt Umber, Payne’s Grey, Opaque White, Carbon Black.
Jackson’s currently have a watercolour sale on until 4th April, if that’s more your thing.
We live near the Santa Cruz Coast in CA, USA. The studio can be "coolish" but never below 60 degrees F and late summer into 80s F--certainly not like your part of the world. I think I put this layer on in early Feb. It's still drying. When I use oil paints, I like to have "mixing white" with a little zinc white which dries a little faster and is a little more transparent than pure opaque titanium. That's why I asked Cranfield about a "mixing white"for the Safe Wash. I've tried gently blowing with low temp hair dryer to get air moving on hanging prints. I'm going to smash this one between some blotter paper now as it is still tacky to the touch. It's now one more test piece anyway. I have found that Safe wash black does dry quickly-- almost too quickly for a series. The orange mixed from process yellow and process magenta and a "nick" of wax dryer dried within a few days. The process yellow with a "nick" of wax dryer on first layer dried in a day or so. The green with process yellow and cyan and nick of dryer in a day. I'll keep experimenting.
Thank-you ever so much for all your expertise and willingness to share the good, the bad, and the ugly! Mary comfort
I'm fairly new to lino printing. Started with the Caligo Safe Wash Process set. Played with the extender. With new little reduction print used tiny bit of their wax drier. However, I did not discover wax drier at first and, yes, it appears that opaque white takes FOREVER to dry--especially as a layer over layers of extended ink on a light weight paper. Did you ever add a drier to your Safe Wash opaque white? I even had an extended correspondence with Michael from Cranfield to ask if he had a mixing white with zinc for instance. Not in the Safe Wash. So, when I use it next time I will add wax drier and sees what happens. I just splurged on an extended range of the Caligo Safe Wash (Ultramaraine only comes in a tin) in much the same colors as you did for the Traditional. So, I need to save my investment. Did you ever ask Cranfield (Caligo) about a quicker drying Safe Wash White? Thanks! Mary Comfort