
Mistakes were made
(Recovery is in progress)

Before I say anything else I must start with a huge thank you to everyone who came to see us at the York Printmakers Print Fair last weekend, especially if you braved the tempest and floods to reach us on the biblically wet Saturday. It was, as always, an enjoyable and good-natured event with many interesting conversations and much laughter - the sort of gathering that restores your faith in humanity - and I know I speak for all my fellow printmakers when I say that the kind, appreciative and often insightful comments about our work gave us a huge lift.
Also a special welcome to those of you who have subscribed to this newsletter as a result of your visit; it’s lovely to have you here!
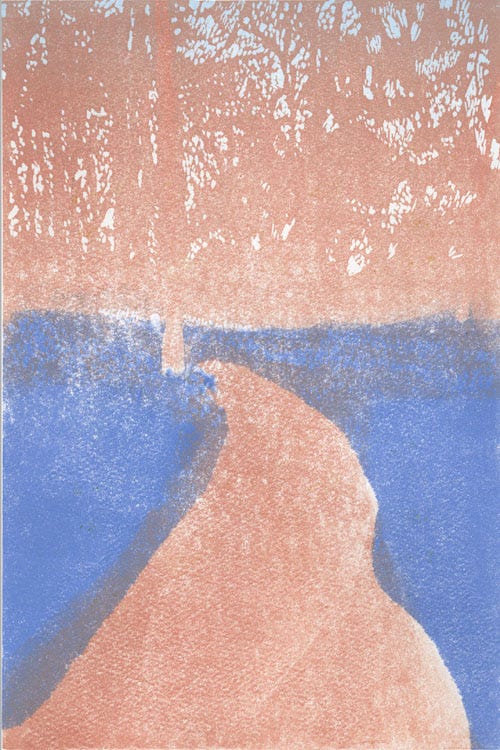
Back in the studio I am still getting to know the new Cranfield inks I bought earlier in the year. I love many things about them including the smoothness of application and faster drying times (though more of that later), however I am having to relearn some colour-mixing. My current print is a woodland path in the spring (yes more bluebells - is that a problem??) and for the third layer I rolled on two shades of light green - a very yellowy green on the top half for the tree canopy and a stronger green on the lower half to be, eventually, the lightest blades of grass. I made these colour mixes with different ratios of cool yellow and cobalt blue but I used a LOT of opaque white as I wanted this layer to cover the previous purple and pale brown. The image below is the print before I printed the greens so you can see what I was covering.
The good news is that with this ink it seems I can get away with using a lot of white without issues of the white pigment re-emerging through subsequent layers (as in the horror story I told last year1), but it also seems to dull yellow down more than I am used to. When I returned to the drying rack the next day I wasn’t happy with the colours and felt they weren’t bright enough. I decided to go over the whole image (apart from the path) with a single very translucent layer of yellow, a bit like laying a wash in watercolour. I mixed a small amount of cool yellow with a lot of extender and printed everything again.
Here is the before and after - it’s a very subtle difference but it is an important one, at least it is to me.
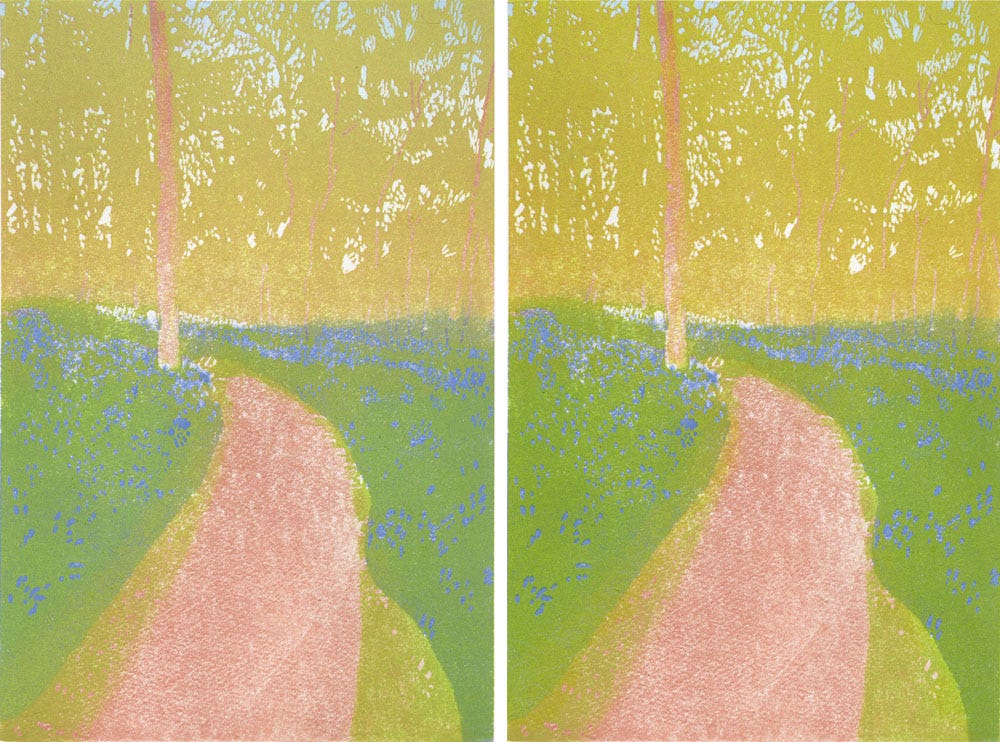
So I think I have rescued the print on this occasion, but I am going to have to be cautious in future and do more colour-mixing experiments.
Having recovered from the colour mistake, I then made another one by not adding wax driers2 to the new yellow layer. As I mentioned, these inks dry quite quickly (or at least not as painfully slowly as some) but I had got complacent about this. I really should have considered the fact that this yellow layer contained a lot of extender, which by its very nature is gooey and contains no pigments to oxidise for air drying, and that the paper was now covered with previous layers of ink so there would be little drying through absorption. Consequently it is now three days after I printed the yellow and I am still drumming my fingers waiting to be able to print the next layer. I will3 remember next time!
With any luck my prints will have dried by the time I write again and I will have made some further progress.
Until then, thank you for reading.
Jane

Wax driers contain metallic elements which promote drying by oxidisation. These elements are naturally present in some pigments, especially the earth colours, but the use of driers helps things along.
Might
I wonder if it’s the quantity of white in the previous layer that’s slowed the drying? The Caligo one takes forever doesn’t it, I haven’t got any experience with the traditional oil one yet though. Just wondering if putting the other layer over it so soon might have slowed it down?
I don’t know which inks you’re using but You can use the Caligo extender even if you’re using traditional relief inks, it dries really fast so I don’t have to use driers. Plus you can get it in caulking gun size which is mega fun.