
A solution to all my problems
Well maybe one of them

There is always a better way to do something. Actually no that’s nonsense. In fact I usually live by the combined principles of ‘If it ain’t broke, don’t fix it’ and ‘Perfect is the enemy of good’. So unless something is glaringly wrong I tend to work around problems rather than risk messing everything up by changing things. This might explain why I didn’t get around to having our central heating replaced until this year by which time more than half the radiators in the house weren’t working, and had up until then got through several winters with supplementary electric heaters, jumpers and an insistence that the icy atmosphere of the spare bedroom was handy for cold storage, even if less good for guests. (To be fair, the horrendous upheaval and eye-watering cost also played their part in my procrastination, but now as winter approaches again I have not a shred of doubt that what we went through in May was All Worth It).
So what this means is that in the studio I had been bumbling along with my old registration method for too long. The results were usually OK and I was producing good prints, but I occasionally had frustrating and upsetting mishaps which resulted in lost prints, and there was generally more stress than desirable.
But hang on Jane, what is registration?
Registration is lining up successive layers of a print so they are all positioned exactly over one another. The fewer layers and the more simple shapes you have, the more likely you are to be able to get away with a slight slip and probably only you will even notice. I was enormously relieved a few years ago to notice that the registration on more than one Japanese woodblock print on display in the actual Ashmolean Museum was ever so slightly out. I remind myself of that frequently.
However, there are limits to how far you can push the excuse ‘it just shows it is handmade’, and when you are printing as many overlapping layers in as much detail as I do then just a couple of millimetres out of true can make the whole image look fuzzy and disturbingly out of focus.
For the last few years I have made jigs from stiff single-layer cardboard. I would butt strips of leftover mountboard (waste not want not) against three sides of the lino plate and then stick them down with glue to create an exact slot for the lino. I would tape the Ternes Burton registration pins (see further down for how these work) in place and then ‘all’ I had to do for each print was slide the inked block into place and attach the paper to the pins.
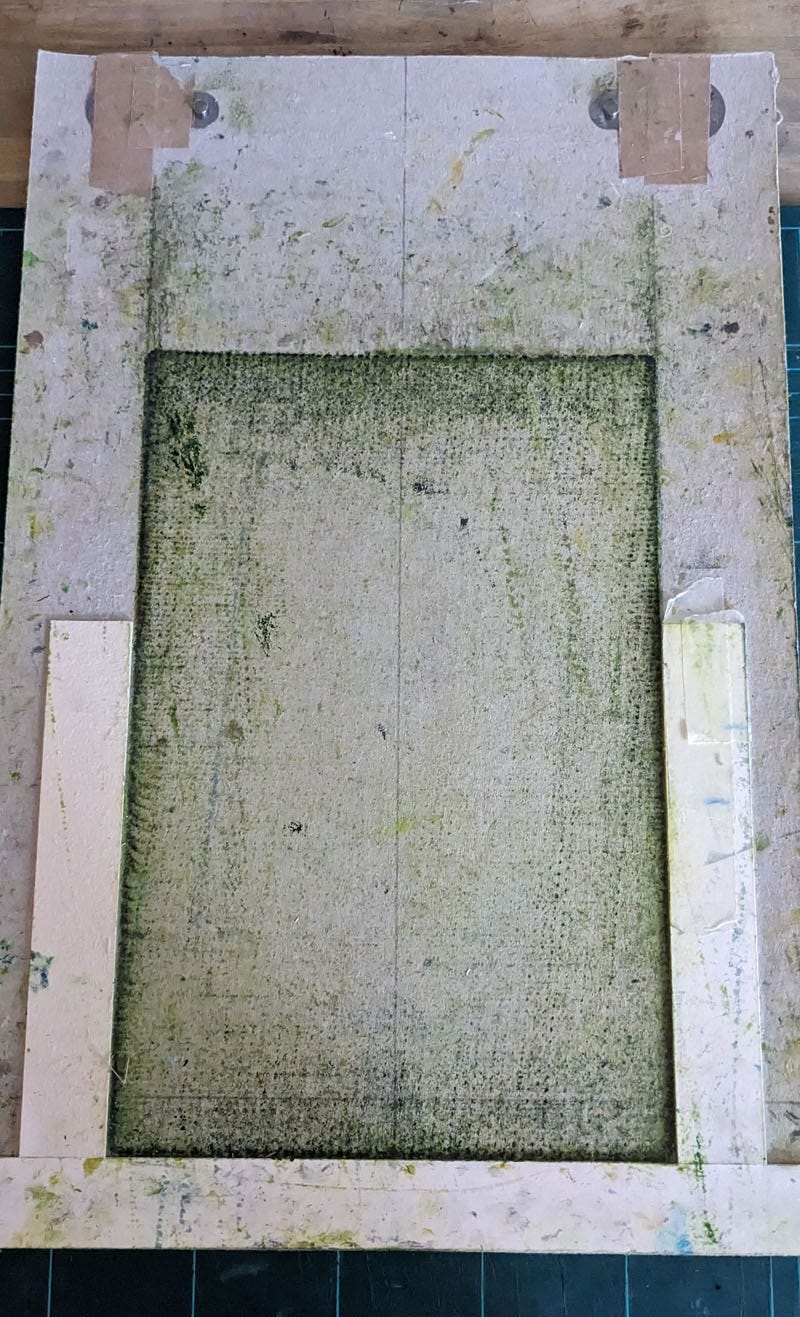
90% of the time this would work fine, but it is very easy to fail to push a block all the way home, especially when trying to avoid touching the ink, and it’s even possible to push it a little too far so it rises up against the end-stop. And the fact you can slide the block in at all means there must inevitably be a little give on each side - just a millimetre or so….but that’s enough to mess things up.
So I decided to try a method I have seen several printmakers use, notably my friend Laura Boswell, of sticking their lino down onto a permanent jig, rather than positioning it each time. I was worried about two things: making a mess of the jig when inking and difficulty carving the block in situ. Oh I was also worried that a stiff plywood jig would make it hard to print with even pressure. The three things I was worried about were inking, carving and a ruthless problem with pressure.
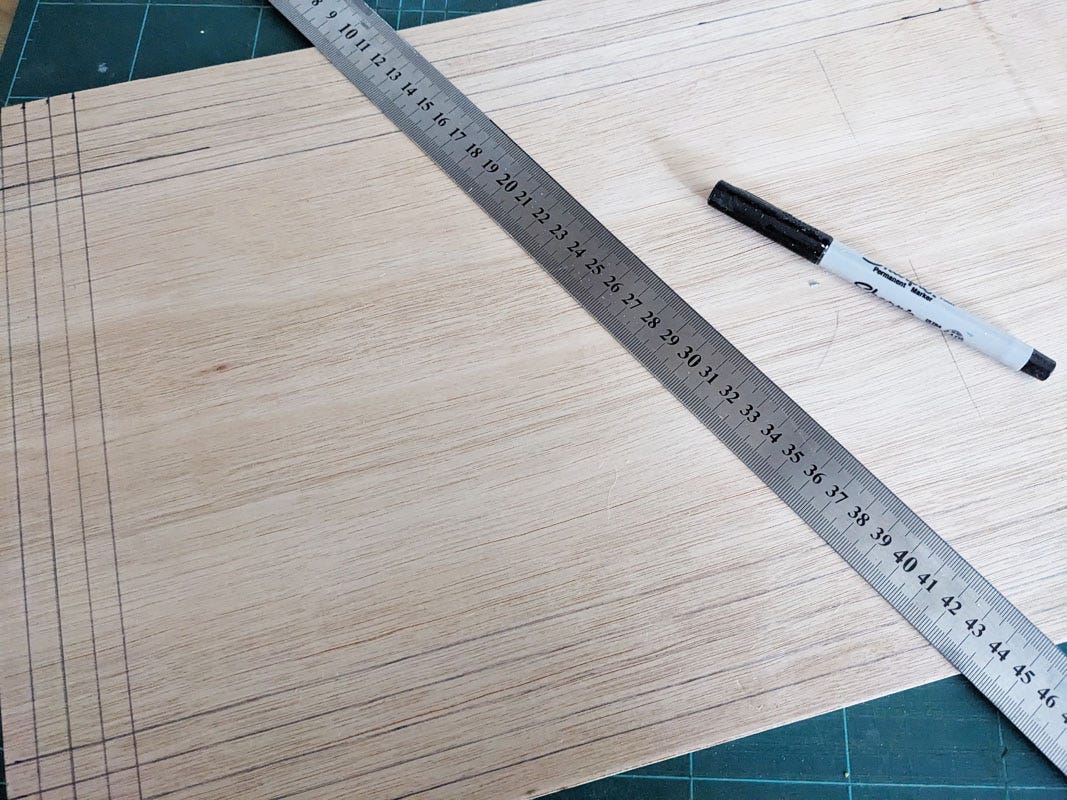
Nevertheless I decided to give it a try. So I took myself off to our local DIY store, found a big sheet of 3.6mm plywood and then the nice chap at the timber cutting station cut it down into four smaller pieces that will suit my usual size prints. Once I’d sanded down the edges I marked the space for a 20 x 30cm plate and also marked centimetre grid lines around it; these aren’t really necessary but I knew they would help me position the paper initially when applying the Ternes Burton tabs.
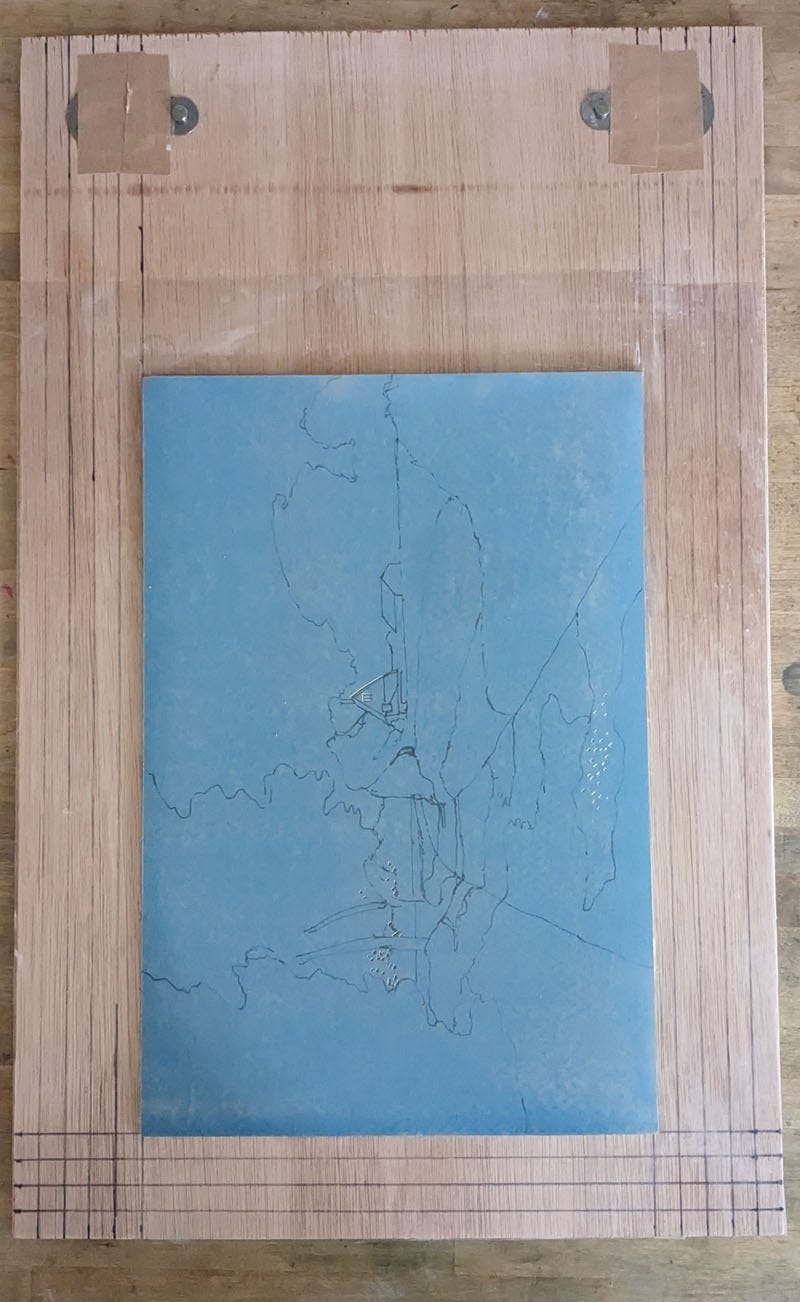
Now to stick on the block, and for this I used double-sided carpet tape which I had to buy online as it’s surprisingly hard to source locally, and which is very sticky. I am assured by fellow York Printmaker Jen Dring that I will be able to pull the block off eventually and reuse the jig. We shall see.

Once the block was in place I was able to position the Ternes Burton pins. In theory I should be able to leave these here now for subsequent lino blocks of the same size.
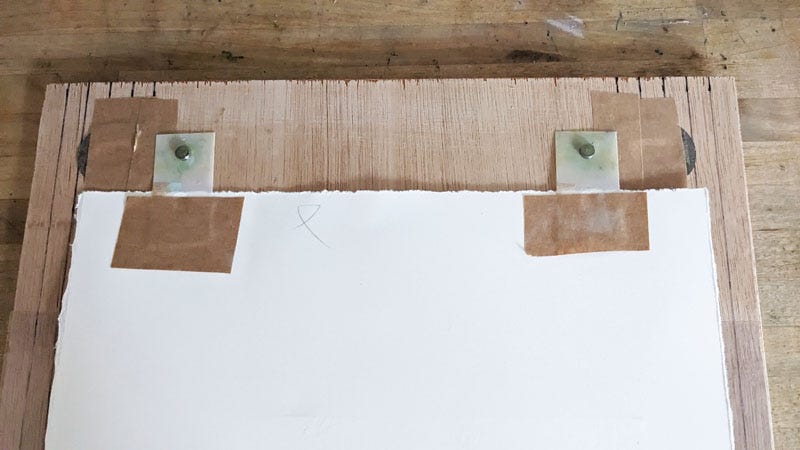
I keep mentioning the Ternes Burton system. This comprises pins that you stick down on your jig and then tabs which attach to your printing paper and stay there throughout your printing process. By popping the tabs in place over the pins then your paper should, so far as anything is guaranteed in this imperfect world, always fall in exactly the same place over your printing block. Pins and tabs can be bought in the UK from Handprinted and Jackson’s (and no doubt other suppliers too but these are the ones I know).
So what of my two, no three, chief worries?
Making a mess. Yes I was right. Unlike some of the printmakers I see sharing impressive videos on Instagram and YouTube, I am incapable of rolling ink onto a block without getting ink on the surrounding area. Not only did I know this would happen, I knew it would bother me. So at the last minute I stuck clear sticky-backed plastic on the jig around the block and this allows me to wipe ink off quickly and easily as I go. You might be able to see it in the photo further up of the block stuck to the jig.
Carving. I was concerned the added width and rigidity of the jig would make reaching to carve the block difficult. So far it has not been as bad as I thought, though there is inevitably less flexibility in turning the block around to get different angles. I am undecided as to how much of a problem this is going to be.
Pressure. There is a definite difference here. The plywood is slightly warped and it is also much noisier to work on with my hand press. I have printed only one layer of ink so far and that was patchy, but this is quite normal for the first one or two layers. The real test will come after a couple more layers when I am printing over ink rather than directly onto the paper - that is usually more even. Watch this space.
Plus points:
Registration. Obviously, the big one. This SHOULD be a complete end to misregistered prints….
Handling. It can be quite tricky to move and position an inked block, especially in the early stages with few carved areas where it is safe to touch. Not only do you risk spoiling your beautifully rolled ink but you (I) will inevitably get ink all over your (my) fingers which can then get on your pristine paper, your phone and your (yes OK my) face. This system means no more picking up inked blocks.
Security. In addition to the challenge of positioning the block in my old jig before printing, there could also be problems during printing when I peeled back the print to check progress and see what parts needed additional work. Usually I remembered to make sure the block hadn’t moved before replacing the paper but sometimes it did shift slightly without me noticing and then….damn. Now the block can’t move.
So that’s as far as I’ve got. Next time I will tell you a bit more about this new print and let you know how I am getting on with my new registration system.
See you soon
Jane
A footnote - family news
RIP Jessie Duke: 4th September 2002 - 31st October 2024
(No that isn’t a typo; she really did make it to 22).
Thank you for this post. Registration has been a huge headache for me as I keep printing things wonky 🙄 with my cardboard one. I am going to give this jig idea a go!
So sorry to read about your cat.. What an age though!
I have been eyeing Laura's jig up for a while now and had very similar thoughts about whether these issues would cause me to regret the time taken to try (always try things though, hey.) Sounds like you are generally in the positive camp so far? Living your prints btw.