
Please show your working
Keeping track of the printmaking process

People are sometimes surprised to hear that before I start carving a new reduction print I write out a numbered list of all the stages ahead of me. Number one is easy - it’s nearly always ‘carve white’. That doesn’t require too much thinking. Item two on the list though will be printing the first colour, and from that point frankly all bets are off. Sometimes if I’m lucky the first one or two colours are obvious, but I will quickly be having to make some difficult decisions about how to layer colours and which bits need to be carved away in which order, and trying to visualise the development in my head. My initial written list usually ends up with changes, crossings out and additions as I go.
For many years these plans for new prints would be written on scraps of paper and then promptly lost when the print was completed. This meant that with every new print I was starting from scratch and also that when people asked me how I’d achieved a particular effect I would often have to mumble that I couldn’t remember.
So a couple of months ago I decided to try to be more organised and I started keeping both plans and progress in a scrapbook.
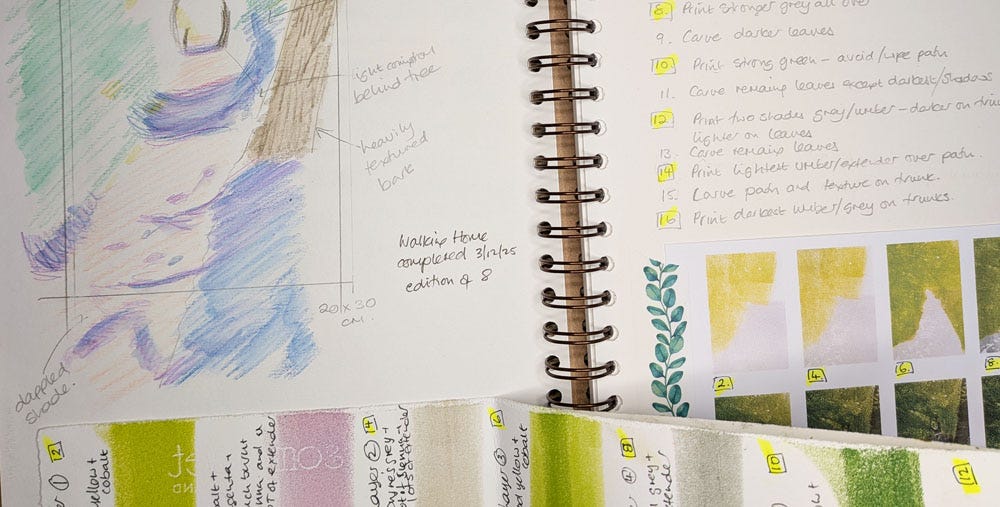
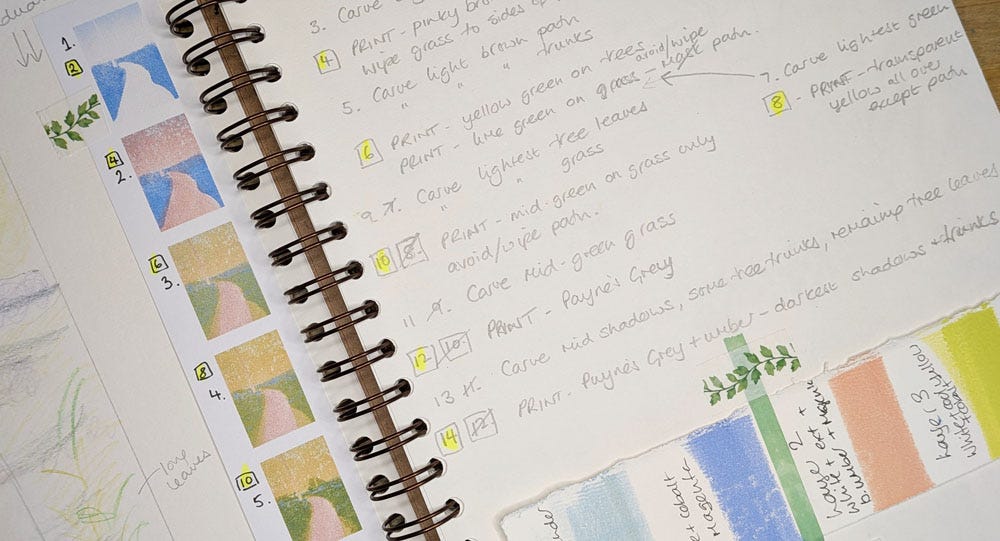
After making a (very) rough sketch I write out my numbered list. As a general rule, the odd numbered stages will be the carving and the even numbered ones are the printing - so an 8 layer print like the one in the plan shown above will have 16 different stages. Carve, print, repeat. This example, my recent ‘Walking Home’, is a rare one in that I started out planning 16 stages and that is what I ended up doing. Far more often things go like the one below (‘Bluebells in April’) where things get changed and layers get added, so the original stage 12 ended up being stage 14, after an extra layer was slipped in after the third layer/sixth stage. The stages highlighted in yellow are the printed layers, so with fourteen stages this was a seven layer print. (Are you with me so far?)
For a while now I’ve been keeping swatches of the colours used in prints but to be honest, without the plan to refer to, this would give me only hints as to how I had done something once the dust had settled and I’d forgotten it all. Now I can keep this with the plan and notes and it will ALL MAKE SENSE. Yes it will.
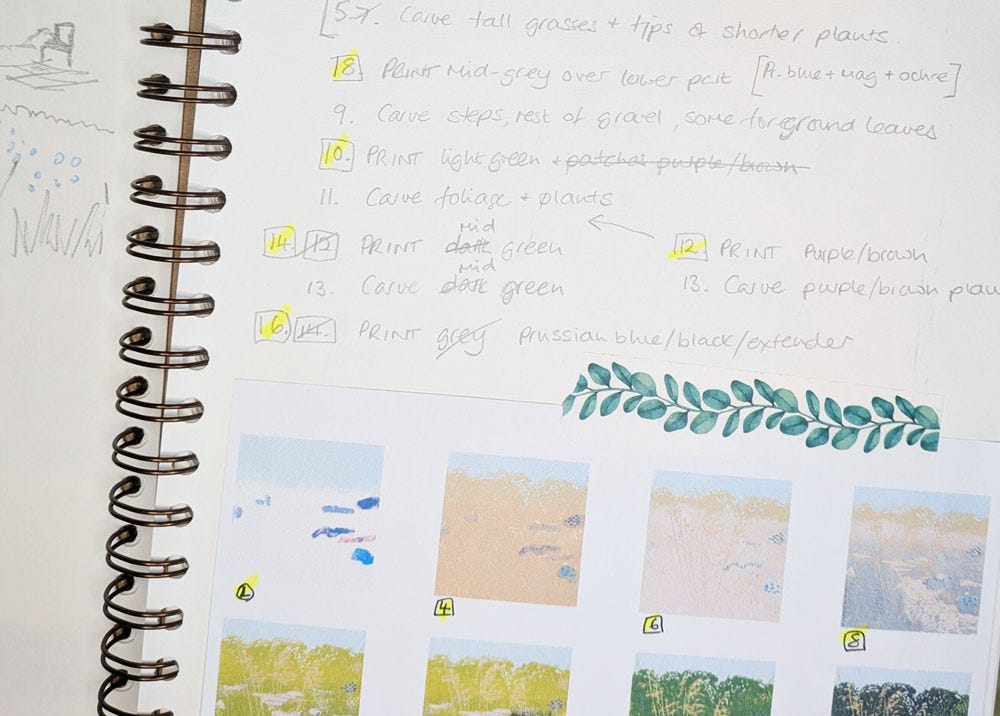
I have also long had a habit of scanning prints as each layer is added so I can put them together in the short process videos you will have seen in previous newsletters (like this one of ‘By the River’). I now print these scans off as a series of tiny thumbnails and stick those in the scrapbook too, numbered to cross reference with the plan. The one below is the ‘Beningbrough’ mini-print which you can see ending up being 8 layers of printing.
I have great hopes that when I want to print something similar to something I have done before, I will now have a recipe book to help me, which should save time and stress. I might be kidding myself here but only time will tell. Perhaps equally importantly, I will have something extra to show people when I am explaining how I make my prints, so if you are able to come to my Open Studio in April you can have a closer look.
Talking of explaining what I do, that brings me neatly to this…
FAQs
I have created a new Frequently Asked Questions page on my website in which I answer some of the questions I am most often asked about my work. If there’s something I haven’t addressed do drop a comment below. The page is a work in progress and will grow as more questions are asked.

New exhibition
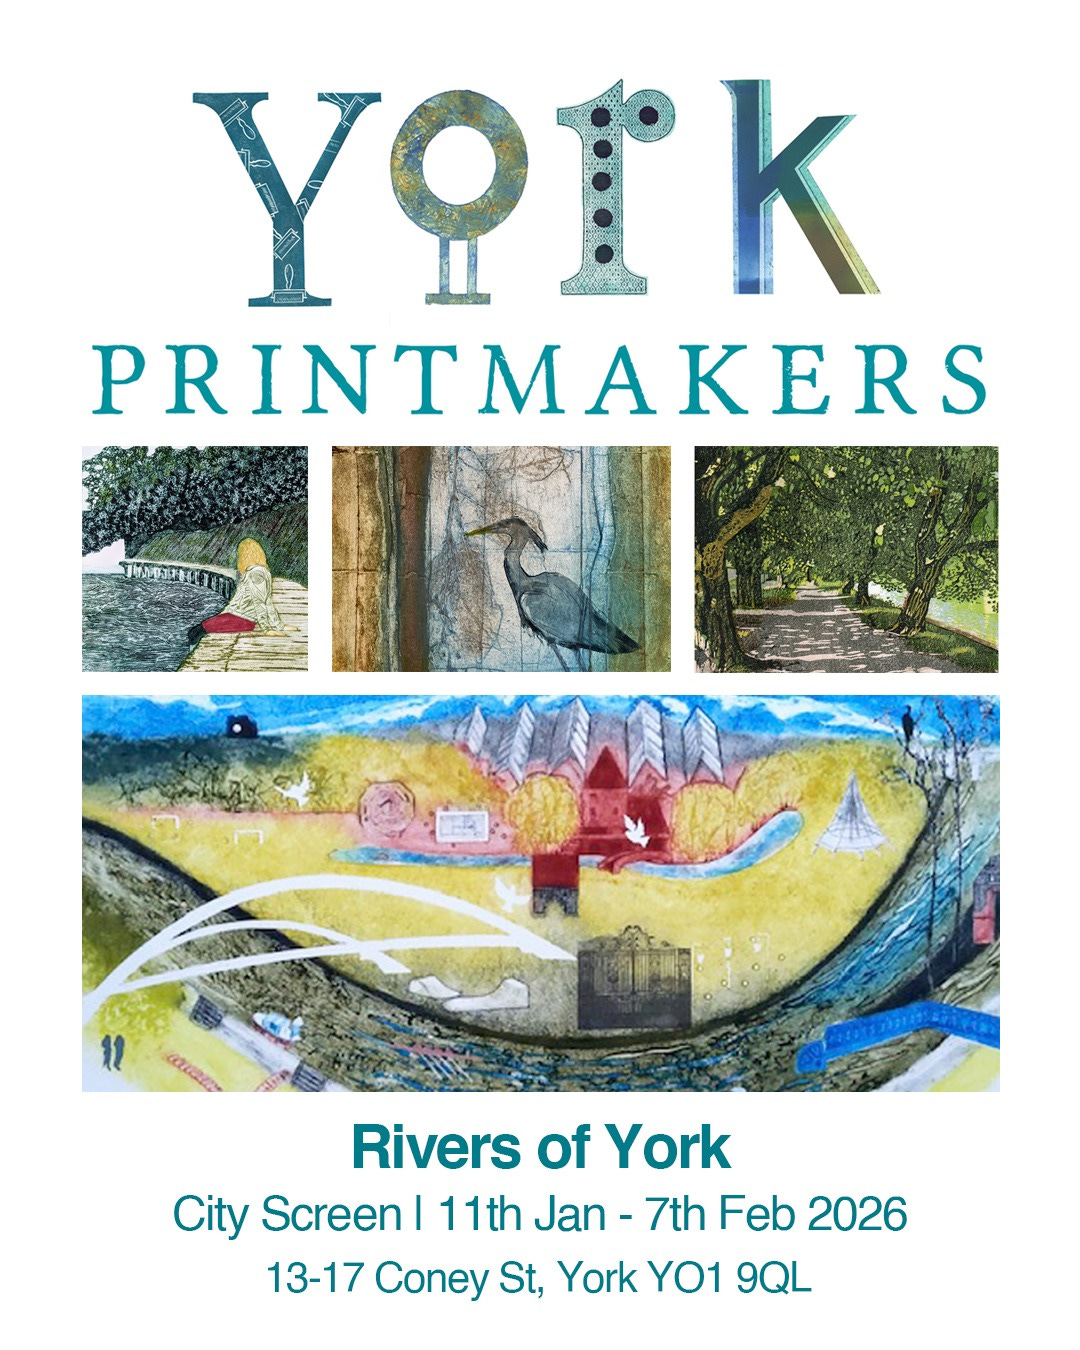
A special themed exhibition to mark the tenth anniversary of York Printmakers opens on Sunday (11th January) in the City Screen cinema in the centre of York. Prints on the theme of ‘Rivers of York’ will be on display downstairs in the café and upstairs in the corridor leading to the cinema screens. If you can join us on Saturday 17th January between 2 and 4pm then you will not only be able to meet the printmakers but will also be offered birthday cake!
And finally, nothing to do with printmaking
This seems an appropriate time of year to share something that has made a big difference to my well-being over the last few months. If you haven’t come across Justin Neto you can get a flavour of his utterly joyful dance classes on his Instagram account with videos like this one.
Last summer Justin started offering online classes. You can pay for an individual class or subscribe monthly (which I do) or even yearly. Two new half-hour classes are uploaded every week. They are HUGE fun so if you are looking for a bit of New Year exercise that doesn’t involve the intimidation (is that just me?) and hassle (definitely not just me) of going to a gym and instead can be done in your own home and in your own time, this might be for you. After more than 60 years I have finally found a form of structured exercise that doesn’t feel like a penance or provoke furious resentment. If you think this might be your sort of thing too you can find out more on Justin’s website.
That’s all for now. Thanks as always for reading and I’ll see you again soon.
Jane
really inspired to keep track of my printing steps now! Thanks for a deeper look at your process- and the workout video at the end was pure joy.
I could not love the look of that dance class more. I did try some at home classes last year but they weren't quite right – might give him a go!